
For concentrate enthusiasts chasing the cleanest, smoothest vapor profiles, finding a device that balances flavor purity with portable power is the ultimate goal. The Longmada Crystal 1 Full Kit has earned a legendary reputation at our online vape store for its pristine, integrated heating chamber system. By ensuring your premium wax or live rosin never touches exposed metallic wiring, the Crystal 1 completely eliminates harsh, scorched tastes.
Whether you just ordered your Crystal 1 Full Kit (Atomizer + Battery Bundle) or want to optimize your current setup, this professional engineering guide breaks down the correct electrical assembly physics, smart firing modes, safe thermal maintenance, and cross-compatibility hacks.
1. Electrical Physics: Safe Assembly to Prevent Short Circuits
The Crystal 1 uses a sub-ohm circuit to instantly heat your concentrates. To protect your device's smart chip from unexpected power surges, you must follow the correct physical installation order:
⚙️ Step-by-Step Assembly:
-
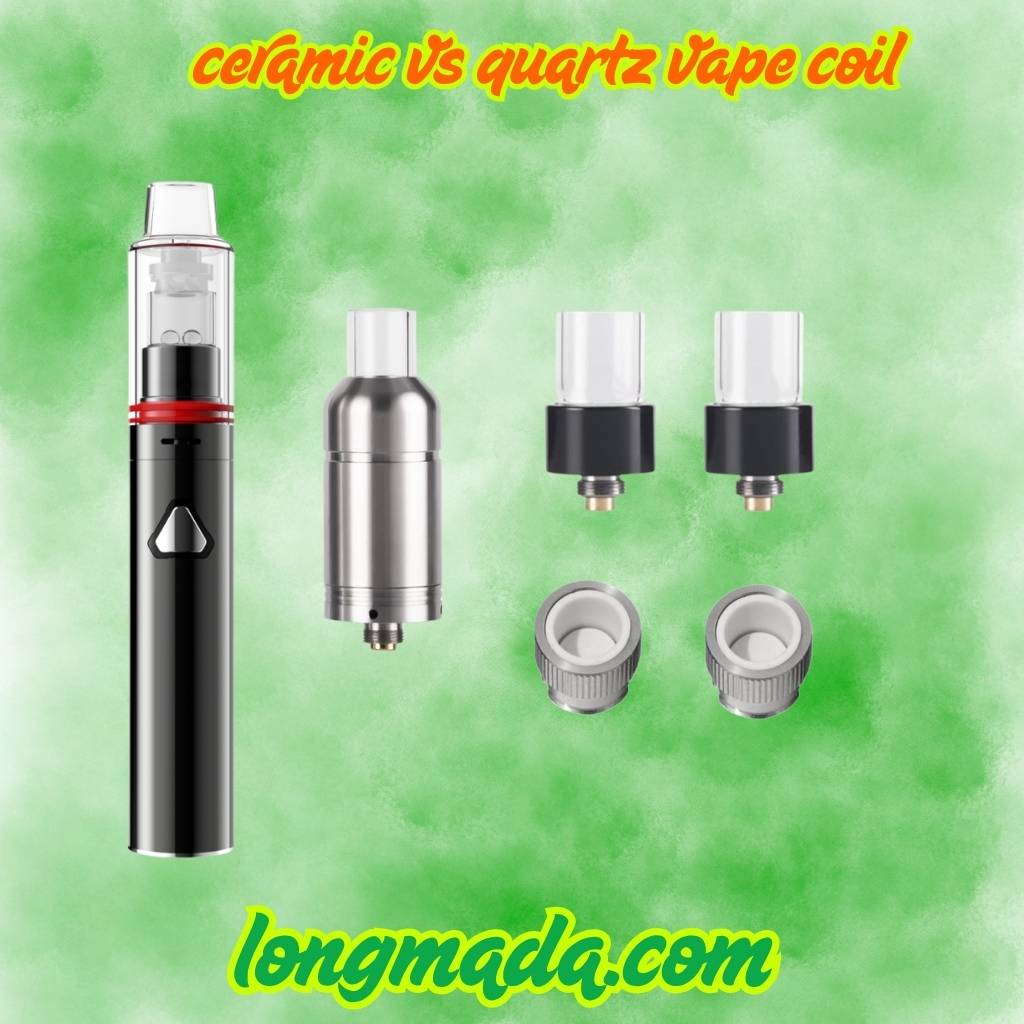
Thread the Core First (coil): Always screw your replacement quartz/ceramic core firmly into the metal atomizer base before connecting anything to the battery.
-
Connect to the Battery Rod: Once the core is securely threaded into the base, screw the entire assembled atomizer onto your high-drain battery rod.
-
🚨 Critical Engineering Warning: Never attach an empty atomizer base to a live battery and try to screw the core cup in last. Doing this can misalign the spring-loaded gold-plated firing pins and cause a permanent short circuit.
🔄 Safe Disassembly:
-
Always reverse the physics: First, completely unscrew the entire atomizer body from the battery, and only then remove the core cup from the base for replacement or cleaning.
2. Advanced Operation: Mastering Firing Modes & Battery Longevity
The Crystal 1 Kit comes paired with a highly calibrated, variable-voltage smart battery. Knowing how to manipulate its button combinations will maximize both your battery lifespan and your material efficiency.
Quick-Start Steps:
-
Load Your Material: Gently pull off the Pyrex glass mouthpiece. Place your wax or concentrate directly into the bottom of the heating pot, then reattach the mouthpiece.
-
Power On/Off: Click the power button rapidly 5 times.
Firing Cycles: Manual vs. Smart Auto Mode
-
Smart Auto/Pre-Heat Mode (20-Second Cycle): Click the button rapidly 2 times. The battery will initiate a 20-second continuous heating and pre-heat profile. Click 1 time at any point to pause the cycle.
-
Manual Mode (Highly Recommended): Press and hold the button down continuously to heat the chamber on demand.
💡 Pro-Tip for Material Preservation
Always wait until your material has fully melted into a liquid state before taking your first draw. We highly advise using Manual Mode over Auto Mode. Manual mode allows you to release the power button the exact millisecond your vapor thins out, instantly stopping thermal radiation, preventing scorched residue, and saving your expensive concentrates from going to waste.
🚨 Crucial Battery Shutdown Rule:
If you are running the 20-second Auto Mode and want to completely shut down your device, you must click 1 time to pause the heating cycle first, and then click 5 times to power off. Attempting to force-quit the device by clicking 5 times directly while the automatic heating sequence is active can overload the control board and cause permanent battery chip failure.
3. Maintenance Guide: 30-Second Thermal-Safe Clean
Keeping your glass chamber spotless ensures crisp flavor. However, performing maintenance at the wrong time can permanently ruin your hardware.
-
The Method: Dip a cotton swab into 90%+ Isopropyl Alcohol (ISO). Thoroughly wipe down the inside of the glass cooking pot and clean the 510-threaded connection joints on the battery to remove sticky oil buildup.
-
🚨 Thermal Shock Warning: Never attempt to clean the device while it is still hot. Always allow the glass and core to cool completely to room temperature before applying alcohol. Applying cold liquid to a freshly fired hot chamber can cause immediate thermal shock, instantly fracturing the glass walls or cracking the heating core.
4. Smart Buying & Compatibility Guide: Upgrading Your Crystal 1
When customizing your setup through our online vape store, here is how to get maximum value and unlock hidden cross-compatibility features:
-
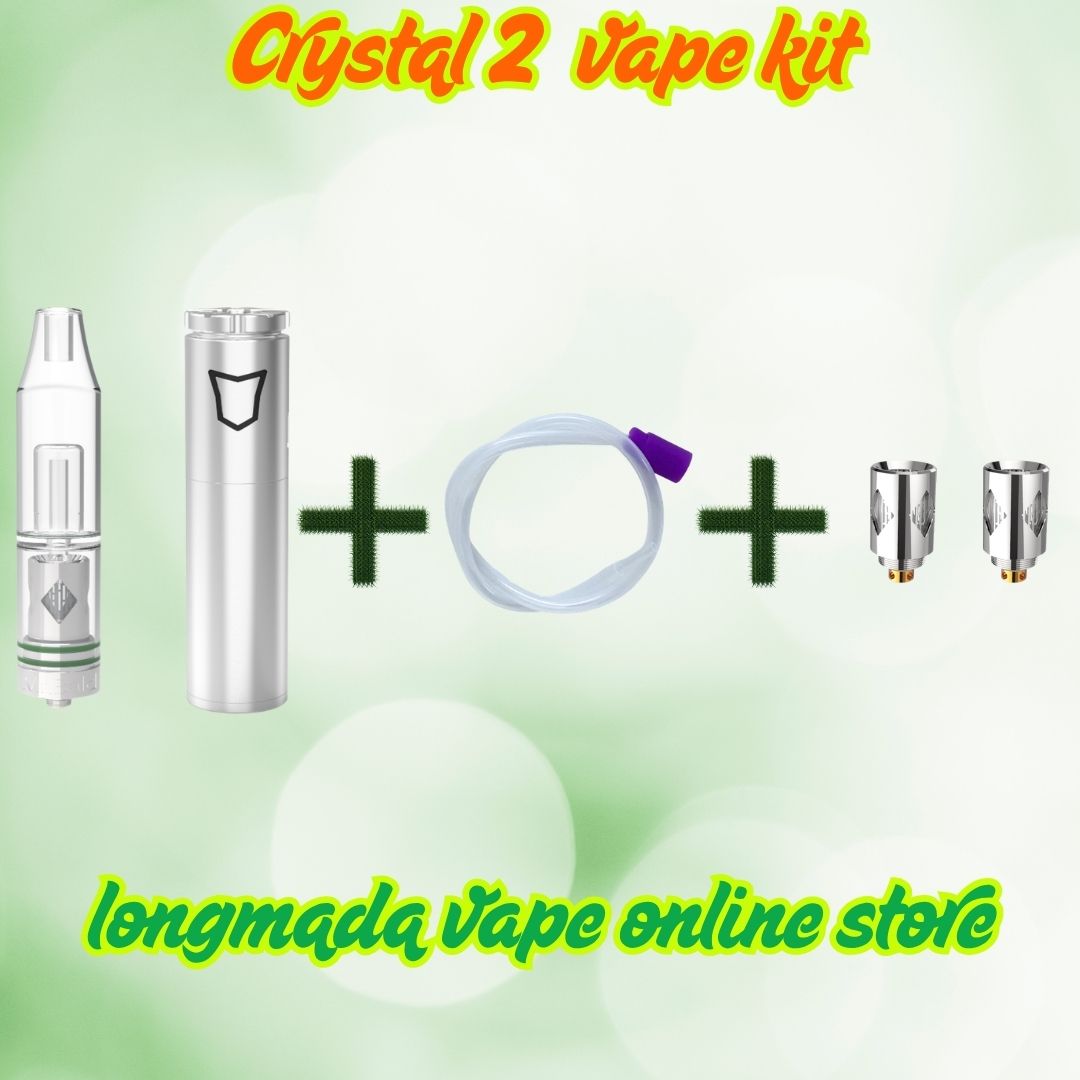
The Starter Bundle (Best Value): We highly recommend purchasing the Official Longmada Crystal 1 Full Kit and adding a 3-pack or 5-pack of Crystal 1 Replacement Coils to your cart to prevent session interruptions down the road.
-
The Crystal 2 Water Filter Hack: Want to add smooth, ice-cool water filtration to your portable device? The Crystal 1 is fully compatible with the Crystal 2 Water Bubbler Attachment. By swapping the glass, your Crystal 1 instantly gains full water rig functionality!
-
⚠️ Crucial Compatibility Note: While a Crystal 1 core coil can be used inside a Crystal 2 setup, the Crystal 1 glass mouthpiece CANNOT be used with a Crystal 2 core coil. The Crystal 2 core has a longer physical dimension, which will choke your airflow and ruin vapor production.
-
-
The Couch-Relaxer Setup: You can also pair your Crystal 1 with our premium, medical-grade Silicone Whip/Hose Accessory to turn your pocket pen into a flexible, desktop-style whip station.
Conclusion: Factory-Direct Support from Longmada
At Longmada, our relationship with you doesn't end at checkout. Whether you encounter payment processing failures, credit card blocks at checkout, international shipping delays, or need real-time technical troubleshooting for your 510 hardware, we are here for you.
Contact our customer care team directly via email or WhatsApp, and our specialized technicians will resolve your inquiry immediately.